Concepts
3D printing layer height: which to choose and what it changes
Layer height is the thickness of each "slice" the slicer cuts your model into. It's the setting that most affects two things you notice right away: how long the print takes and how visible the layers are. Here's what it changes, its limits for your nozzle and how to save time without losing finish.
What changes when you raise or lower it
Prusa sums it up: layer height is the main factor in both print time and vertical resolution. Taller layers shorten the print a lot at the cost of more visible lines; thinner layers give more detail but take longer. The effect shows most on sloped and curved surfaces, where layers form a staircase.
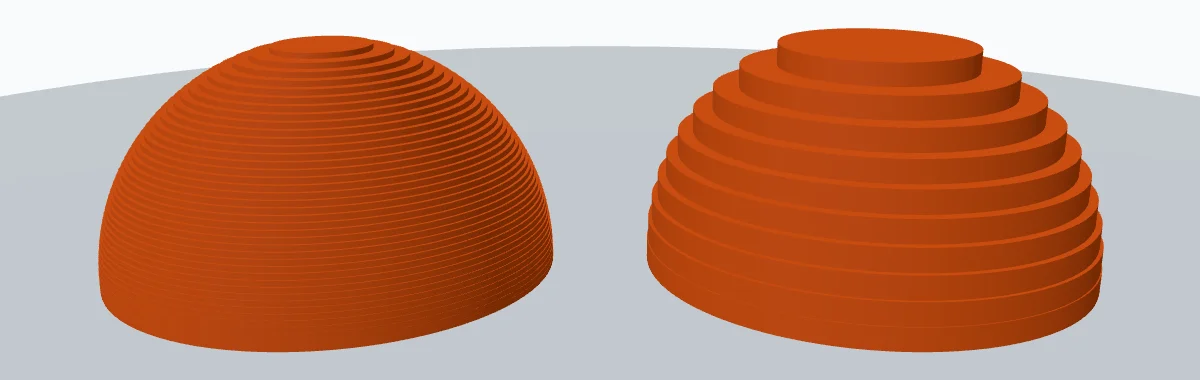
One detail people often forget: layer height only changes vertical resolution. Horizontal detail, like small text or a thin edge, depends mostly on the nozzle diameter (Prusa). We explain it in what is a hotend.
The limits: your nozzle decides
- Maximum: Prusa recommends staying below 80% of the nozzle diameter. With the standard 0.4 mm nozzle, that's about 0.32 mm. It can never exceed the nozzle diameter (PrusaSlicer throws an error if you try).
- Useful minimum: Prusa doesn't advise going below 0.10 mm: at 0.07 or 0.05 mm the improvement is small and print time skyrockets.
Layer height and speed
There's a less obvious link. Bambu Lab explains that with thinner layers each line carries less plastic, so the hotend has to melt less per second at the same speed: it's a way to print fast without exceeding the volumetric flow it can handle. The trade-off, as Bambu itself warns, is that many more layers are needed for the same height and total print time rises sharply.
Which height to choose
A guide for a 0.4 mm nozzle, always within the limits above:
0.10-0.12 mm
Miniatures, figures and parts with gentle curves where layers would show.
0.15-0.20 mm
Most parts: a good balance between finish and time.
0.24-0.28 mm
Prototypes, brackets and functional parts where looks matter little (always below 80% of the nozzle).
Some tools ask for the layer height you'll print with. The lithophane generator, for example, uses it so the thinnest part of the piece comes out as several solid layers.
The first layer, separately
Even when printing thin layers, a thicker first layer can help, as it sticks better to the bed. Slicers let you set it separately, in millimetres or as a percentage of the normal height (Prusa gives 150% as an example). Careful: if you change it, Prusa warns you'll probably need to recalibrate the first layer. If your part won't stick, check why your print won't stick.
The trick to not choosing: variable layer height
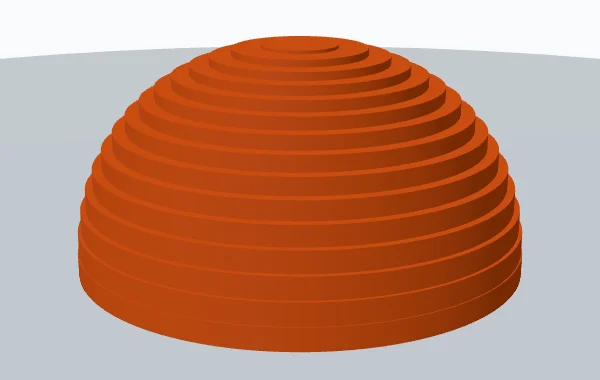
Why use the same height across the whole part if the staircase only shows on curves? PrusaSlicer has a variable layer height function that assigns thin layers only where needed and thick ones elsewhere, smoothing the transition. According to Prusa, the result can be a much shorter print with minimal quality loss. It can be applied automatically, by hand or both.
Frequently asked questions
- What layer height should I use with a 0.4 mm nozzle?
- Prusa recommends staying below 80% of the nozzle diameter: with 0.4 mm, about 0.32 mm at most. For most parts, around 0.15-0.20 mm is a good balance; for fine detail, 0.10-0.12 mm.
- Is printing at 0.05 mm worth it?
- Almost never. Prusa doesn't advise going below 0.10 mm because the quality gain at 0.07 or 0.05 mm is small and print time skyrockets.
- Does layer height improve edge detail?
- No: it only changes vertical resolution. Horizontal (XY) detail depends mostly on the nozzle diameter, as Prusa points out.
- Why is the first layer often thicker?
- Because a slightly taller first layer sticks better to the bed, even when the rest prints in thin layers. If you change it, Prusa warns you'll probably need to recalibrate the first layer.
Sources
- Prusa Knowledge Base — Layers and perimeters
- Prusa Knowledge Base — Variable layer height function
- Bambu Lab Wiki — Volumetric speed and how it impacts 3D printing
- Our own three.js renders; layers are exaggerated so they show.